

If you follow me on Instagam you know that one of my goals has been to improve my photography. I felt very overwhelmed and was kind of scared to even try, if I’m being honest. I knew it was the next step I needed to take in improving my blog, so to get started I did a lot of research. A LOT! You can find a lot of what I read here.
I also asked a lot of my blogging friends for advice.
As well as a good friend of mine growing up. Check out her photos here. We played on the same competitive soccer team from 4th grade until we graduated high school and I had no idea she had such an artsy side to her. She’s fabulous! If you’re in Utah look her up!!!
Here’s the gist of what I learned:
- Shoot in RAW
- Learn Photoshop and/or Lightroom
PS does cost money, but they have a pretty reasonable monthly plan that gives you access to Lightroom too. If you have a blog, want to start a blog, or just want to start improving your photography overall I highly suggest you get PS/Lightroom.
Like I said, I have researched a lot, and I still have a lot more to learn, but these are the three edits I make to every picture. Try them out and you will see how you can transform your photos!
1) Brightness/Contrast

I like clean, white photos! I like to keep my photos as bright as possible while still keeping detail in the whites. If you can keep from loosing detail then it won’t be too bright. Trust me. If you don’t feel a little uncomfortable with how bright and white it is, that probably means you need to crank your brightness even more. This will really make your photos pop! Some of my pictures I go as high as 39 and 40 respectively.
2) Levels/White balance

I usually try the auto button for white balance, just to get an idea of how it needs to be adjusted. But if I have a large enough area that is pure white I use the bottom dropper, click on the white of the photo, and it adjusts the levels of the picture according to the area you indicated was white.
3) Vibrance/Saturation

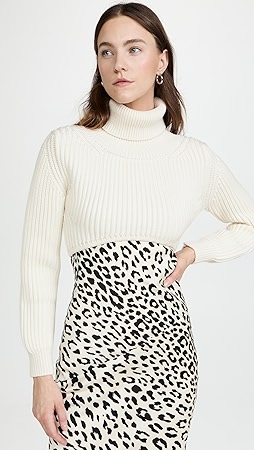
For this particular photo I didn’t change much, but I did adjust it a little.
I think we can all agree that the end product looks much better than the RAW original. Just start playing with your photos, try a lot of different adjustments and you will start to find what you like. Check out pinterest, and blogs {especially mine, haha} and find out what types of pictures you gravitate toward and start from there!
Making beautiful pictures is so fun, and it really is something that everyone and anyone can do!


I need to get PS and LR… 🙂